
Ubuntu 24.04 Cinnamon VNC Setup (Cinnamon) with SSH Tunnel#
Introduction#
I know this is yet another VNC blog post among many out there, but I wanted to document the exact steps I took to set up my local infrastructure for future reference. Writing things down helps me keep track of what I’m doing and how I did it especially when I revisit something months later.
Below are the steps I used to configure two Ubuntu 24.04 systems (server & client) running Cinnamon for secure SSH-tunneled VNC connectivity with TLS and Password authentication.
Why This Setup?#
My goal was to support two use cases:
- A virtual desktop session that runs independently of the physical display (useful for headless or persistent sessions)
- A shared display session that connects to the live desktop
TigerVNC supports both models cleanly, and when paired with SSH tunneling, it keeps everything private without exposing VNC ports directly to the network.
Overview#
Two VNC configurations are set up on remote server media-01:
- Virtual desktop (
:2, port5902) — isolated session viatigervncserver - Shared display (
:1, port5901) — live desktop session viax0vncserver
Both are bound to localhost only and accessed via SSH tunnel.
Architecture (Simplified)#
Client
  |
SSH Tunnel (5901 / 5902)
  |
TLS (X509Vnc + Password)
  |
media-01
  ├─ x0vncserver (:1)    -> shared live display
  └─ tigervncserver (:2) -> virtual desktop
Server Prerequisites#
Static IP Configuration#
Before setting up VNC, I configured a static IP for media-01 to ensure
it is always reachable at 192.168.2.124. This was done via my router.

Packages#
1sudo apt install tigervnc-standalone-server
2sudo apt install tigervnc-scraping-server
3sudo apt install dbus-x11
Password Setup#
1vncpasswd ~/.vnc/passwd
2chmod 600 ~/.vnc/passwd
Note: VNC passwords are limited to 8 characters and use weak DES obfuscation. File permissions plus SSH tunneling are the real security controls here.
Desktop Session Startup Script#
Create ~/.vnc/xstartup:
1#!/bin/bash
2exec /usr/bin/cinnamon-session
Make it executable:
1chmod +x ~/.vnc/xstartup
Determining the Correct DISPLAY#
Do not assume the physical display is :1. On many Ubuntu systems it is
:0.
Verify using:
1echo $DISPLAY
2loginctl list-sessions
Adjust your systemd service accordingly.
Systemd Service — Virtual Desktop (:2)#
I created a systemd file at /etc/systemd/system/tigervncserver@.service so that the virtual VNC server
is always online on startup of Ubuntu:
 1[Unit]
 2Description=TigerVNC Server
 3After=network.target
 4
 5[Service]
 6Type=forking
 7User=box02
 8WorkingDirectory=/home/box02
 9
10PIDFile=/home/box02/.vnc/%H:%i.pid
11ExecStartPre=-/usr/bin/vncserver -kill :%i
12ExecStart=/usr/bin/vncserver :%i -localhost -SecurityTypes X509Vnc -X509Key /home/box02/.vnc/x509_key.pem -X509Cert /home/box02/.vnc/x509_cert.pem -PasswordFile /home/box02/.vnc/passwd
13ExecStop=/usr/bin/vncserver -kill :%i
14
15Restart=on-failure
16RestartSec=5
17
18# Optional hardening
19ProtectSystem=full
20ProtectHome=true
21PrivateTmp=true
22NoNewPrivileges=true
23
24[Install]
25WantedBy=multi-user.target
Enable and start:
1sudo systemctl daemon-reload
2sudo systemctl enable tigervncserver@2.service
3sudo systemctl start tigervncserver@2.service
Systemd Service — Shared Display (:1)#
I created a systemd file at /etc/systemd/system/x0vncserver.service so that the shared VNC server
is always online on startup of Ubuntu:
 1[Unit]
 2Description=TigerVNC Shared Display Server
 3After=network.target
 4
 5[Service]
 6Type=simple
 7User=box02
 8Environment=DISPLAY=:1
 9Environment=XAUTHORITY=/home/box02/.Xauthority
10
11ExecStart=/usr/bin/x0vncserver -display :1 -localhost -fg -SecurityTypes X509Vnc -X509Key /home/box02/.vnc/x509_key.pem -X509Cert /home/box02/.vnc/x509_cert.pem -PasswordFile /home/box02/.vnc/passwd
12
13Restart=on-failure
14RestartSec=5
15
16ProtectSystem=full
17ProtectHome=true
18PrivateTmp=true
19NoNewPrivileges=true
20
21[Install]
22WantedBy=multi-user.target
Adjust
DISPLAYif your system uses:0.
Useful Commands#
Here are some commands I used on the remote server to restart and view service logs.
1journalctl -fu tigervncserver@2.service
2journalctl -fu x0vncserver.service
3
4sudo systemctl restart tigervncserver@2.service
5sudo systemctl restart x0vncserver.service
6
7vncserver -list
Client Setup#
Install VNC viewer packages:
1sudo apt install tigervnc-viewer tigervnc-tools
SSH Key for Passwordless Tunnel#
1ssh-keygen -t ed25519 -C "vnc-tunnel" -f ~/.ssh/media_01_id_ed25519
2ssh-copy-id -i ~/.ssh/media_01_id_ed25519.pub box02@192.168.2.124
Wrapper Connect Script#
At this point I wanted a one-shot script to bring up the VNC session without
having to remember everything involved, saved to ~/bin/vnc-connect:
 1#!/bin/bash
 2
 3set -e
 4
 5export SSH_SERVER=192.168.2.124
 6export REMOTE_PORT=5901
 7export LOCAL_PORT=5901
 8export IDENTITY_FILE="${HOME}/.ssh/media_01_id_ed25519"
 9export CONFIG="${HOME}/.config/tigervnc/media-01-shared.tigervnc"
10export PASSWD="${HOME}/.vnc/passwd"
11
12SSH_PID=$(pgrep -f "ssh -f -N -i ${IDENTITY_FILE} -L ${LOCAL_PORT}" || true)
13if [ -n "$SSH_PID" ]; then
14  echo "Lingering ssh tunnel found killing it now"
15  kill $SSH_PID
16else
17  echo "No ssh tunnel found starting one now"
18fi
19
20ssh -f -N -i ${IDENTITY_FILE} -L ${LOCAL_PORT}:127.0.0.1:${REMOTE_PORT} box02@${SSH_SERVER}
21sleep 1
22nohup xtigervncviewer -passwd "${PASSWD}" "${CONFIG}" 2>&1 > /tmp/vncviewer.log &
Make it executable:
1chmod +x ~/bin/vnc-connect
Ensure ~/bin is in PATH:
1echo 'export PATH="$HOME/bin:$PATH"' >> ~/.bashrc
2source ~/.bashrc
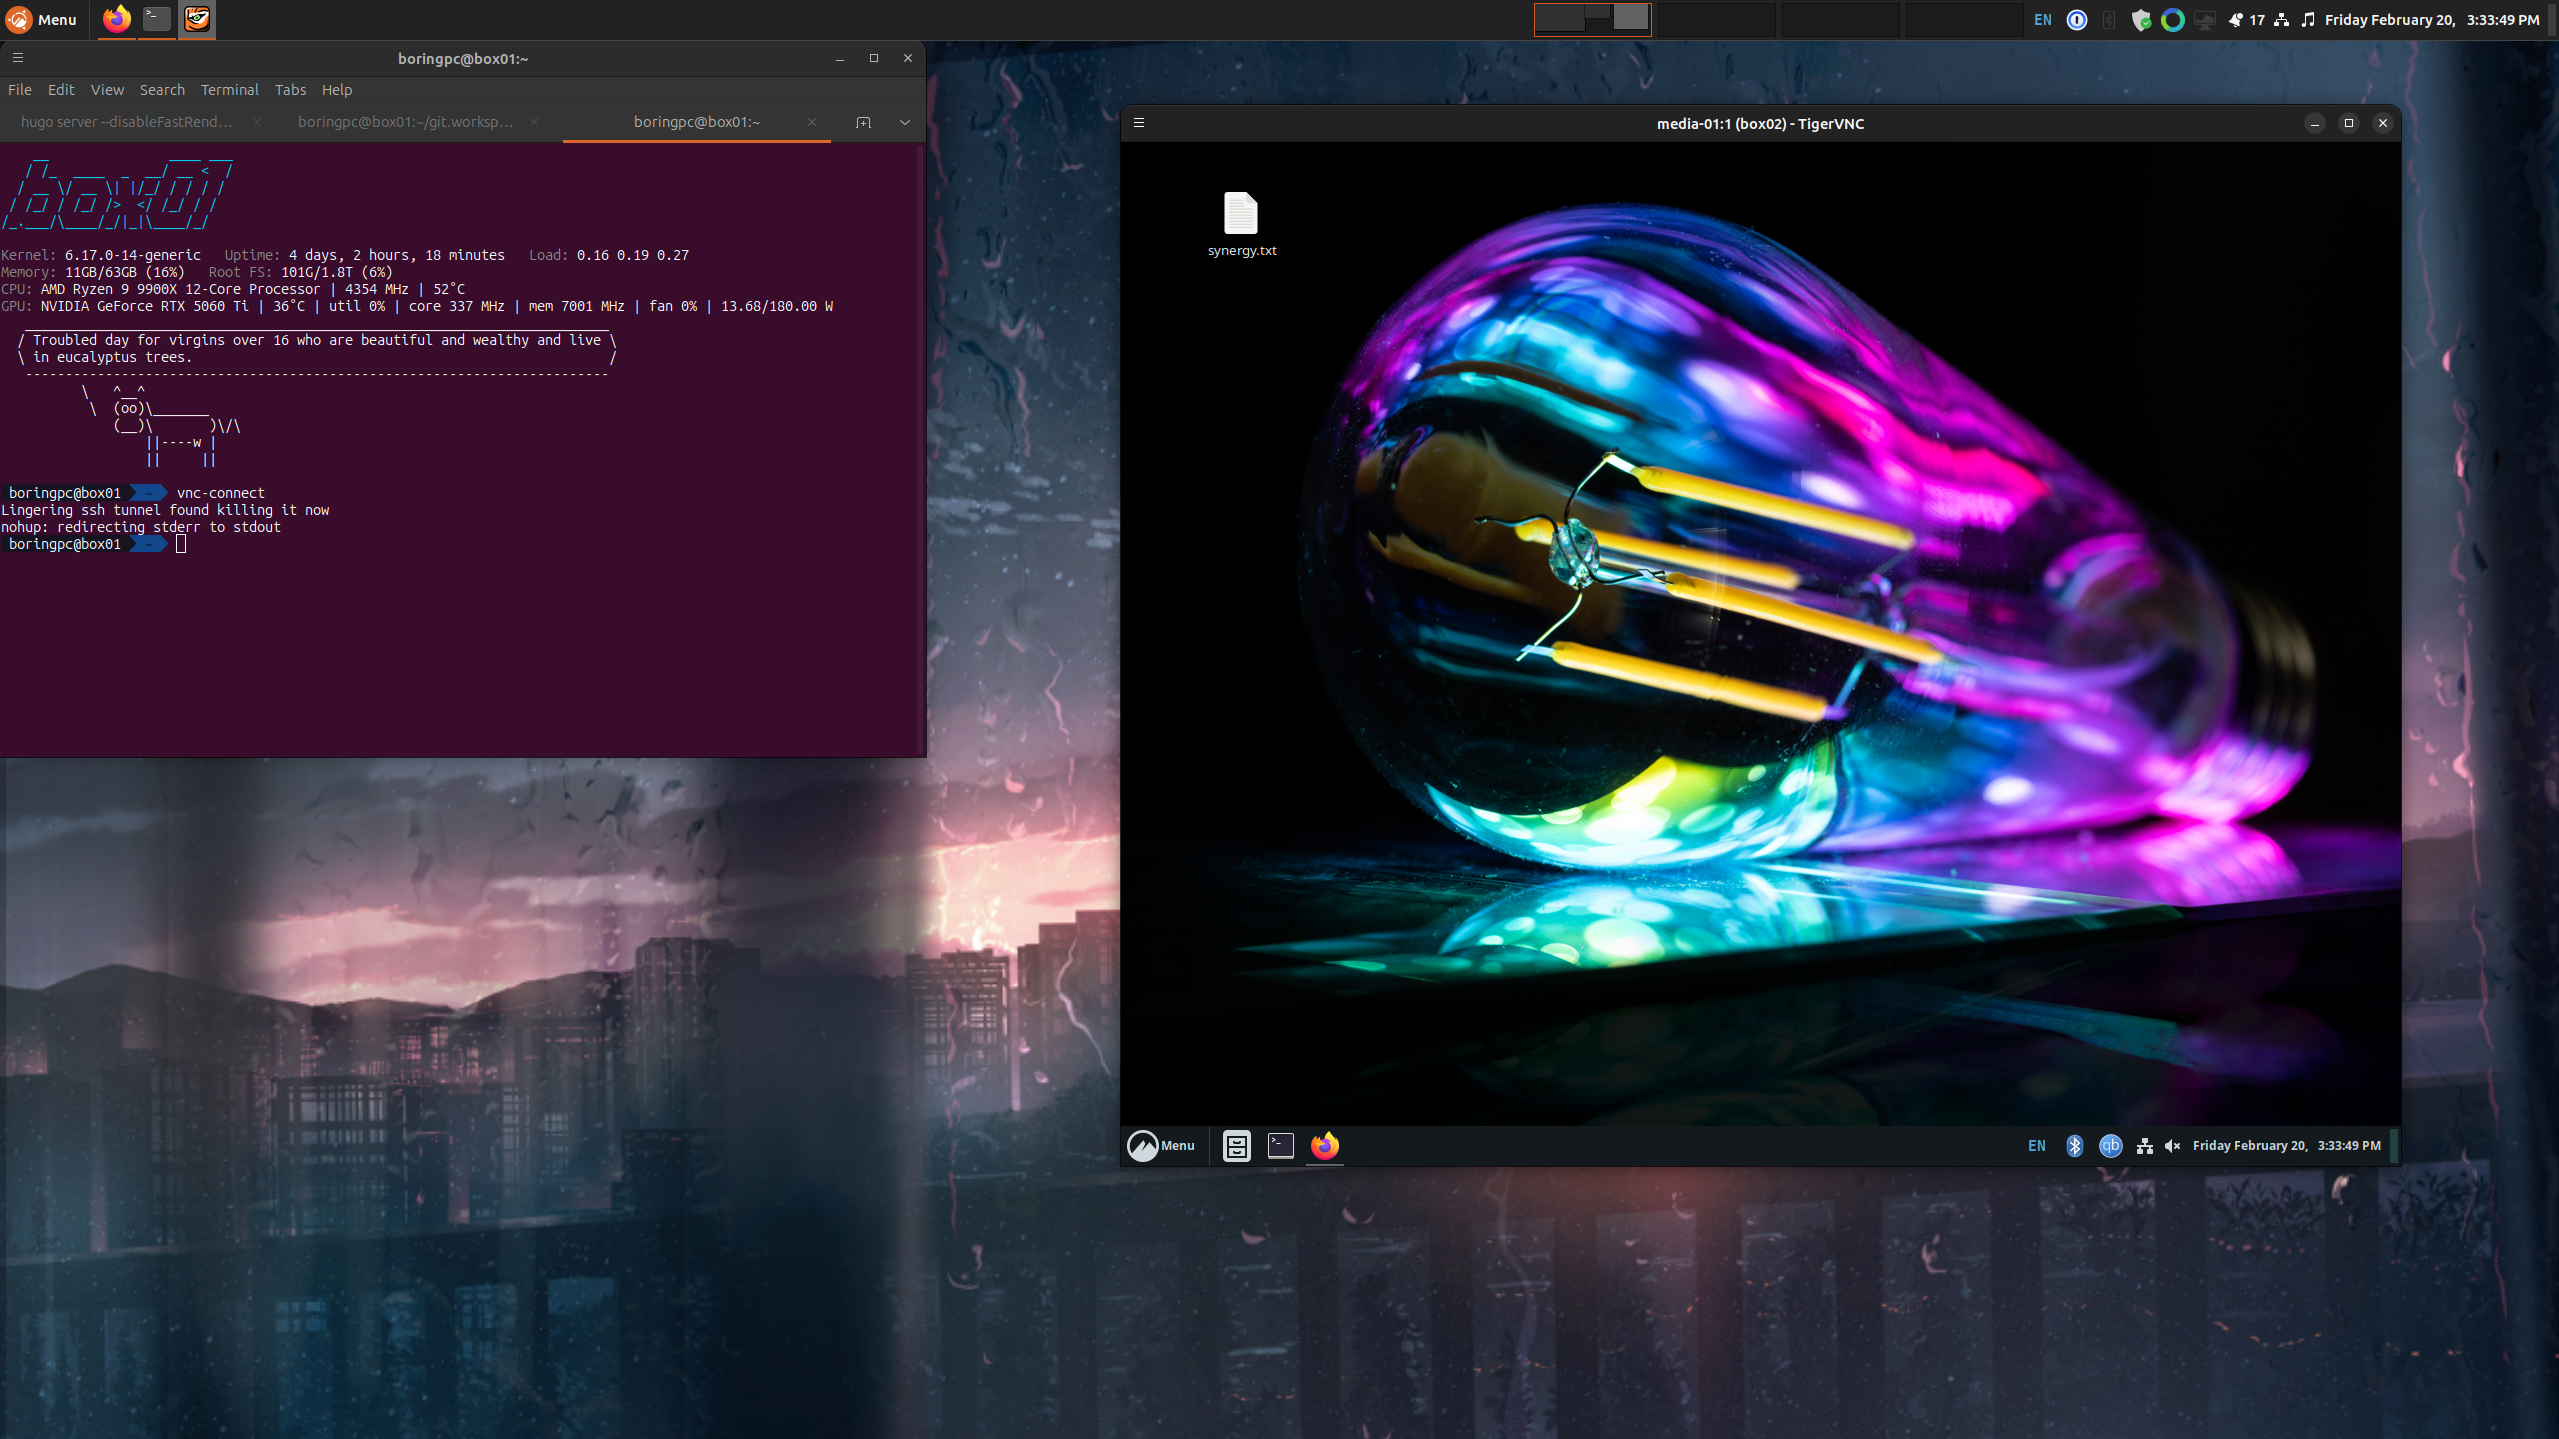
Example Invocation#
Below is an example of me invoking the one-shot script vnc-connect with the TigerVNC viewer
session active.
Manual SSH Tunnel (Optional)#
You can certainly tunnel manually and below is the command if you want to:
1ssh -L 5901:127.0.0.1:5901 box02@192.168.2.124 -N
Then connect your VNC viewer to 127.0.0.1:5901.
Addendum — TLS with X509Vnc#
After the initial setup I decided to add TLS encryption to both VNC servers using
TigerVNC’s built-in X509Vnc security type. Since I was already using SSH tunneling,
this is more of a defense-in-depth measure than a strict necessity — but it’s good practice.
Generating the Certificate#
A self-signed certificate was generated on media-01 using a small script saved to ~/gen-certs.sh:
 1#!/usr/bin/env bash
 2
 3set -e
 4
 5mkdir -p ~/.vnc
 6
 7openssl req -x509 -newkey ec -pkeyopt ec_paramgen_curve:P-384 \
 8  -keyout ~/.vnc/x509_key.pem \
 9  -out ~/.vnc/x509_cert.pem \
10  -days 3650 -nodes \
11  -subj "/CN=media-01" \
12  -addext "subjectAltName=IP:192.168.2.124,IP:127.0.0.1,DNS:localhost" \
13  -addext "extendedKeyUsage=serverAuth" \
14  -addext "keyUsage=critical,digitalSignature,keyEncipherment" \
15  -addext "basicConstraints=critical,CA:FALSE"
16
17chmod 600 ~/.vnc/x509_key.pem
18chmod 644 ~/.vnc/x509_cert.pem
19
20echo "Certificate generated successfully:"
21openssl x509 -in ~/.vnc/x509_cert.pem -text -noout
1chmod +x ~/gen-certs.sh
2./gen-certs.sh
Client Certificate#
Copy the server certificate to the client machine so the viewer can verify the server’s identity:
1scp box02@192.168.2.124:~/.vnc/x509_cert.pem ~/.vnc/x509_ca.pem
TigerVNC Client Config#
At this point I just updated ~/.config/tigervnc/media-01-shared.tigervnc with the below contents
to get the client working with TLS auth. It is a direct copy in its entirety:
 1TigerVNC Configuration file Version 1.0
 2
 3ServerName=127.0.0.1:5901
 4X509CA=/home/boringpc/.vnc/x509_ca.pem
 5SecurityTypes=X509Vnc
 6ReconnectOnError=1
 7Shared=0
 8AutoSelect=0
 9FullColor=1
10LowColorLevel=2
11PreferredEncoding=ZRLE
12CustomCompressLevel=0
13CompressLevel=6
14NoJPEG=1
15QualityLevel=8
16FullScreen=1
17FullScreenMode=Current
18FullScreenSelectedMonitors=1
19ViewOnly=0
20EmulateMiddleButton=0
21DotWhenNoCursor=0
22AcceptClipboard=1
23SendClipboard=1
24SendPrimary=1
25SetPrimary=1
26MenuKey=F8
27FullscreenSystemKeys=1
28desktopSize=1920x1080
Note:
ServerNameuses127.0.0.1instead oflocalhostto match the certificate SANs and avoid a hostname mismatch warning.
Security Considerations#
- Bind VNC to
localhostonly - Access via SSH tunnel
- Avoid exposing ports 5901/5902
- Consider firewall rules even on LAN
- Use key-based SSH authentication
- Use TLS (
X509Vnc) for defense in depth
Troubleshooting#
- Black screen: Ensure
dbus-x11is installed. - Session exits immediately: Check
~/.vnc/xstartuppermissions. - Permission denied: Verify
chmod 600 ~/.vnc/passwd. - Wrong display: Confirm with
echo $DISPLAY. - Wayland issues: Ensure you are running an X11 session if required.
- Certificate hostname mismatch: Use
127.0.0.1instead oflocalhostin the TigerVNC config.
Closing Thoughts#
This setup has worked reliably for me and gives me both a persistent virtual session and live desktop control, all without exposing VNC directly to the network. Documenting it here ensures I can quickly reproduce it later.
I used Claude and ChatGPT as sounding boards while working through this setup. They were helpful for troubleshooting and reviewing the post, but the ideas, decisions, and final edits are mine.